Stellar 主题全面的配置文档可参考源码作者:Xaoxuu
一键配置
Stellar 配置文件在 themes\stellar_config.yml 下面,一般不要直接修改,我们可以在博客根目录下建一个 _config.stellar.yml,在这个文件中的配置信息优先级高于主题文件夹中的配置文件。
然后直接把 themes\stellar_config.yml 里面的复制粘贴进来,再对 _config.stellar.yml 修改即可。
字体设置
- _config.yml 文件中,最后一行加入以下指令:
1
2
3
inject:
head:
- <link rel="stylesheet" href="https://cdn.staticfile.org/lxgw-wenkai-screen-webfont/1.6.0/lxgwwenkaiscreen.css"> - 在 _config.stellar.yml 中找到 style.font-family,修改以下内容:
1
2
3
4
style:
font-family:
logo: '"LXGW WenKai Screen", system-ui, ...'
body: '"LXGW WenKai Screen", system-ui, ...'
添加运行时间/访问量

_config.stellar.yml 文件下,找到 footer,在 content: 之后添加以下代码:
1 | content: | # 支持 Markdown 格式 |
添加评论功能

目前 Staller 主题集成多种评论功能插件,包括 beaudar、utterances、giscus、twikoo、waline、artalk。今日来探讨 waline。
- 配置 waline,参考我的另一篇文章:Hexo 博客美化
- 在博客配置文件 _config.stellar.yml 中启用 waline 评论
1
2
3
4
5
6
7
8
9
10
11
12
13
14
15
16
17
######## Comments ########
comments:
service: waline # beaudar, utterances, giscus, twikoo, waline, artalk
comment_title: 快来参与讨论吧~
# Waline
# https://waline.js.org/
waline:
js: https://gcore.jsdelivr.net/npm/@waline/client@3.1.3/dist/waline.js
css: https://gcore.jsdelivr.net/npm/@waline/client@3.1.3/dist/waline.css
meta_css: https://gcore.jsdelivr.net/npm/@waline/client@3.1.3/dist/waline-meta.css
# Waline server address url, you should set this to your own link
serverURL: https://waline.js.org/ # 这里改成自己的链接
locale:
placeholder:
😎嗨,朋友,留下脚印再走呗。
reaction: true
使用 fontawesome 动态图标

因为 Stellar 不再内置 fontawesome 图标库,所以我们需要手动添加。_config.yml 文件中,最后一行加入以下指令:
1 | inject: |
就可以愉快的使用 fontawesome 动态图标了。比如配置 footer 栏的图标,_config.stellar.yml 文件下,找到 footer
1 | footer: |
给超长代码块增加滚动条
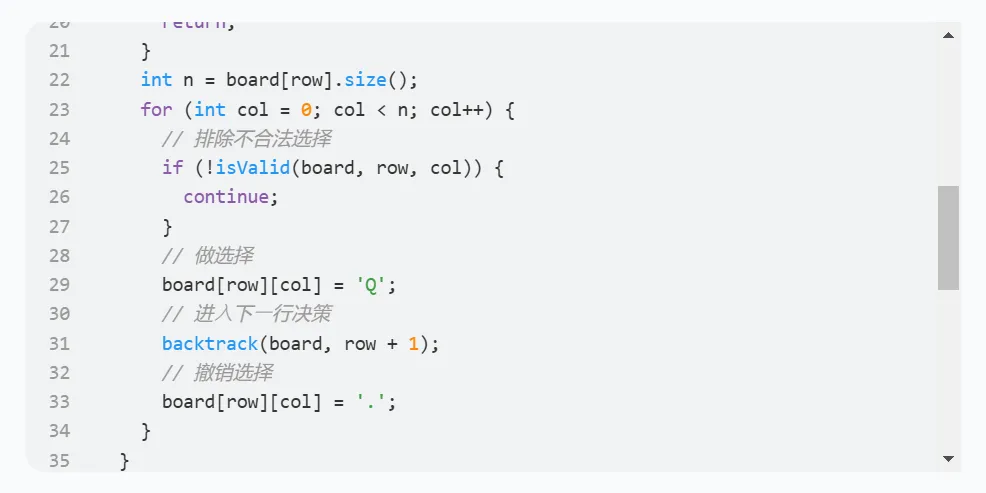
首先判断代码块是否过长,如果是,则设置最大高度并开启滚动。
在 themes\stellar\source\js\ 中新建 custom.js
1 | // 给超长代码块增加滚动条 |
在 _config.yml 文件中,最后一行加入以下指令:
1 | inject: |
需要注意的是,Stellar 主题有 tabs 分栏容器,如果在容器中写入长代码,这段 js 是不生效的。
因为这时候生成的 HTML 结构可能与原始代码块不同,导致 JavaScript 选择器无法正确找到目标元素。
解决方法也很简单,可以直接在 Markdown 文件中使用内联样式来设置代码块的最大高度和滚动条。
1 | <div style="max-height: 300px; max-width: 100%; overflow: auto;"> |
文章面包屑显示字数|阅读时长|标签

- 在 themes\stellar\layout_partial\main\article_banner.ejs 中的
// 3.left.bottom处,新增代码:1
2
3
4
5
6
7
8
9
10
11
12
13
14
15
16// 3.left.bottom
el += partial('dateinfo')
//新增:字数显示|阅读时长显示
el += '<div class="flex-row" id="page-words"><span style="padding: 4px;">本文:' + wordcount(page.content) + '字</span><span class="sep updated" style="padding: 4px;"></span><span class="text updated" style="padding: 4px;">阅读时长:' + min2read(page.content) + '分</span></div>';
//新增:标签显示
if (page.layout == "post" && page.tags && page.tags.length > 0) {
el += '<div class="flex-row" id="tag">'; // 将标签容器的创建移动到条件内部
el += ' <span> 标签:</span>';
el += list_categories(page.tags, {
class: "cap breadcrumb",
show_count: false,
separator: ' ',
style: "none"
});
el += ' </div>';
} - 在 themes\stellar\source\css_custom.styl 文件最后添加:
1
2
3
4
5
6
7
8
9
10/* 文章内字数统计&阅读时长 */
.bread-nav div#page-words span.sep:before {
content: '|';
}
.bread-nav div#page-words span.updated {
visibility: hidden;
}
.bread-nav:hover div#page-words span.updated {
visibility: visible;
}
页面底部字数统计
- 安装 hexo-wordcount 插件:npm i hexo-wordcount –save
- themes/stellar/layout/_partial/main/footer.ejs 文件中,找到
//footer在1
2
3
4
5
6
7// footer
el += '<div class="text">'
if (content) {
el += markdown(content)
}
el += '</div></footer>'
return elel += '</div></footer>'前面加上:1
el += '<span class="totalcount">共发表 ' + site.posts.length + ' 篇Blog · </span><span class="post-count">总计 ' + totalcount(site) + ' 字</span>'
- 在 themes\stellar\source\css_custom.styl 文件最后添加:
1
2
3
4
5
6
7
8
9
10
11
12
13/* 页面底部字数统计 */
.post-count {
scrollbar-width: none;
color: var(--text-p2);
}
.totalcount {
color: var(--text-p2);
}
.page-footer {
text-align: center;
margin: 0 auto;
width: 100%;
}
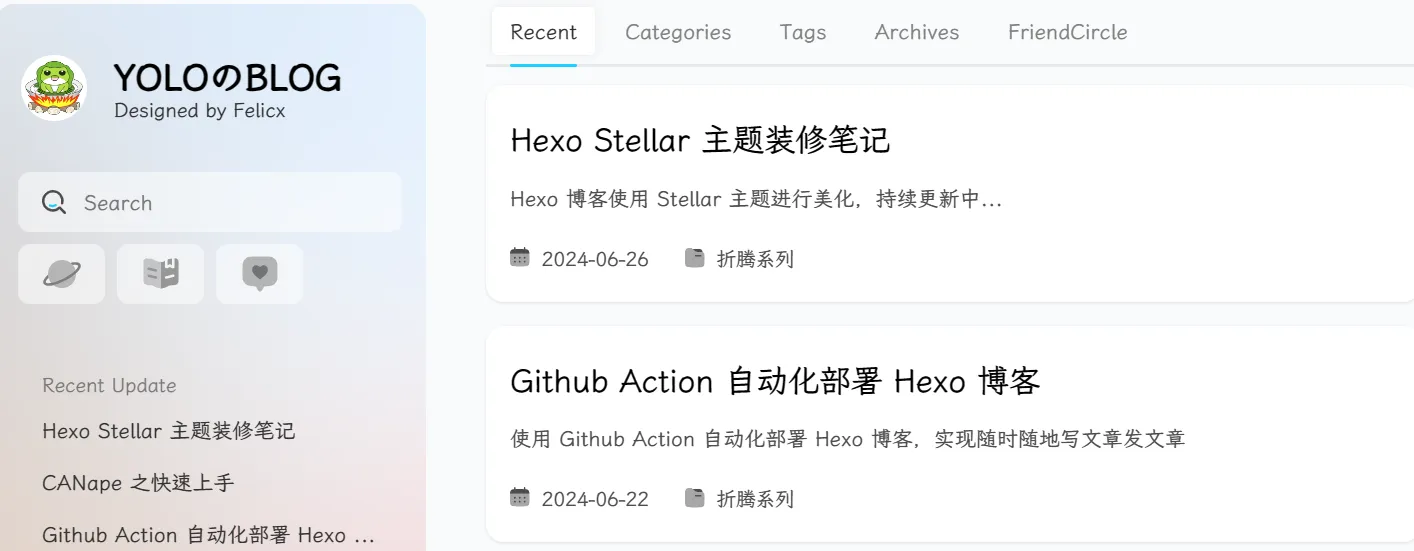
侧边栏欢迎语

- 在 themes\stellar_data\widgets.yml 文件中新增一项侧边栏配置,写下你的网站欢迎语。也可以引用开放接口,如【今日诗词】。
1
2
3
4
5
6
7
8
9# 欢迎语
welcome:
layout: markdown
title: 🎉欢迎
content: |
本站托管于Vercel, 加载缓慢请耐心等待,欢迎大家畅所欲言。
<hr style="border: 1px solid black; background-color: black;">
<span id="jinrishici-sentence"></span>
<script src="https://sdk.jinrishici.com/v2/browser/jinrishici.js" charset="utf-8"></script> - 修改主题配置 _config.stellar.yml,设置欢迎语出现的具体位置
1
2
3
4
5
6
7# 站点主结构树
site_tree:
# -- 列表类页面 -- #
# 主页配置
home:
leftbar: recent
rightbar: welcome
新增 memos 说说功能

想要实现 memos 功能,首先需要注册一个账号。注册账号可以使用别人已经搭建好的 memos,也可以自行搭建 memos(需要有服务器,我就不折腾了)。这里直接采用的杜老师的 memos。
- 查看教程,注册一个自己的账号
- 注册好后,在教程下面评论让杜老师帮忙查看自己的 ID
- 在博客 source 文件夹下,新建 bb 文件夹,在文件夹里新建 index.md
1
2{% timeline api:https://s.dusays.com/api/v1/memo?creatorId={你的ID}&limit=10 type:memos avatar:/assets/icon/20240713_rtEVzmVj.webp %}
{% endtimeline %} - 可以建个图标跳转哔哔页面,找到 _config.stellar.yml 中的 footer,新增一条记录
1
2
3
4
5
6footer:
social:
bb:
icon: '<i class="fa-solid fa-globe-asia fa-bounce"></i>'
title: '哔哔广场'
url: /bb - 如果需要在博客侧边栏 sidebar 中展示 memos,首先在 themes\stellar_data\widgets.yml 中新增一条记录
1
2
3
4
5
6
7# 哔哔
memos-du:
layout: timeline
title: 🥂哔哔广场
api: https://s.dusays.com/api/v1/memo?creatorId={你的ID}
type: memos
hide: user,footer - 然后在 _config.stellar.yml 设置让其生效
1
2
3
4
5
6site_tree:
# -- 列表类页面 -- #
# 主页配置
home:
leftbar: recent
rightbar: memos-du
展示最新评论
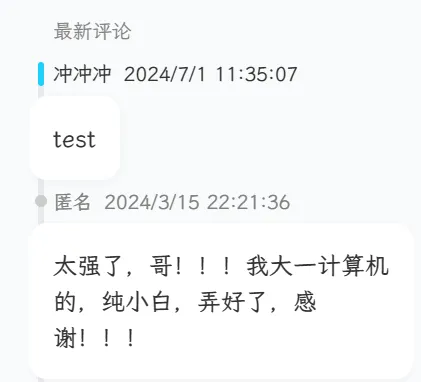
我评论使用的是 waline,所以下面是搭配 waline 食用的,如果有其他评论插件的,参考星日语大佬的文章。
- 在 themes\stellar\source\js\services\ 目录下新建 waline_new_comment.js
1
2
3
4
5
6
7
8
9
10
11
12
13
14
15
16
17
18
19
20
21
22
23
24
25
26
27
28
29
30
31
32$(document).ready(function() {
const default_avatar = 'default_avatar.jpg'; // 替换成你的默认头像地址
const els = document.getElementsByClassName('ds-waline');
for (var i = 0; i < els.length; i++) {
const el = els[i];
const limit = parseInt(el.getAttribute('limit')) || 10;
const apiBase = el.getAttribute('api');
if (apiBase == null) {
continue;
}
const api = apiBase + '/comment?type=recent&count=' + limit;
utils.request(el, api, function (data) {
data.forEach((item, index) => {
var cell = '<div class="timenode" index="' + index + '">';
cell += '<div class="header">';
cell += '<div class="user-info">';
cell += '<img src="' + (item.avatar || default_avatar) + '" onerror="this.onerror=null;this.src=\'' + default_avatar + '\';">';
cell += '<span>' + item.nick + '</span>';
cell += '</div>';
cell += '<span>' + new Date(item.time).toLocaleString() + '</span>';
cell += '</div>';
cell += '<a class="body" href="' + item.url + '#' + item.objectId + '" target="_blank" rel="external nofollow noopener noreferrer">';
cell += item.comment.replace(/<a\b[^>]*>(.*?)<\/a>/g, '$1');
cell += '</a>';
cell += '</div>';
$(el).append(cell);
});
});
}
}); - 在 _config.stellar.yml 中找到 data_services,新增一行记录
1
2
3
4# 内置服务,按需加载(页面内用到了就会加载,没有用到就不会加载)
data_services:
waline:
js: /js/services/waline_new_comment.js - 在 themes\stellar_data\widgets.yml 中创建小组件
1
2
3
4
5
6
7# 最新评论
new_comment:
layout: timeline
title: 最新评论
api: https://example.yourdomain.com # 此处为 Waline server,末尾不要加 /
type: waline
limit: 16 # 限制获取数量,默认为 10 - 编辑 _config.stellar.yml,让最新评论展示在右侧
1
2
3
4
5
6# 站点主结构树
site_tree:
# -- 列表类页面 -- #
# 主页配置
home:
rightbar: new-comment
部署友链
Stellar 支持两种友链,一种是静态友链,一种是动态友链。
实现静态友链很简单,新建 source_data\links\ios_developer.yml,将友链数据写进去即可
1 | - title: 某某某 |
在 source\friends\index.md 中写入
1 | {% friends ios_developer %} |
动态友链比较麻烦一点,参考苏末了大佬的教程。
- Fork xaoxuu/issues-json-generator 仓库,名称设为 friends,任务栏点击 settings 下滑到 issue 点击勾选 √ ,此时任务栏出现 Issue,点击任务栏 Aciton,点击 i understand;
- 点击任务栏 settings,左侧选择 Action 下的 General,下滑到 Workflow Permissions,勾选读写权限 Read and write permissions,然后 save 保存;
- 点击任务栏 Issue,点击 Label,删除现有标签,新增并保留以下四个标签:
active、suspend、404、checklist; - 点击任务栏 Code 点击进入 config.yml 文件,点击修改仓库名和地址;
1
2
3
4
5# 要抓取的 issues 配置
issues:
repo: xaoxuu/friends # 仓库持有者/仓库名(改成自己的)
label: active # 筛选具有 active 标签的 issue ,取消此项则会提取所有 open 状态的 issue
sort: # updated-desc # 排序,按最近更新,取消此项则按创建时间排序 - 点击 issue → New issue → Get Started,填入你的基本信息,label 设置为
active→ submit new issue 提交; - 添加后,等待一会,点击任务栏 Code 进入 output 分支,查看 v2 目录下的 data.json 文件,出现刚才新建的 issue 内容则设置成功;
- 要想使用,需要在 source\friends\index.md 中写入
1
2{% friends api:https://api.vlts.cc/output_data/v2/你的github用户名/你的github仓库名 %}
# 示例:{% friends api:https://raw.githubusercontent.com/FelicxFoster/friends/output/v2/data.json %}
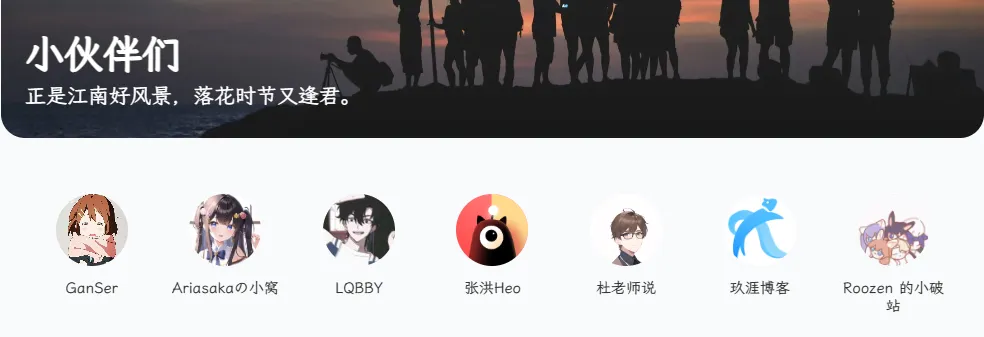
友链朋友圈

友链朋友圈就是展示友链朋友发布的文章,参考xaoxuu大佬的教程。
- Fork xaoxuu/friends-rss-generator 仓库,大佬的教程说是可以 Fork 原作者 Rock-Candy-Tea/hexo-circle-of-friends 的仓库,但是我用原作者的一直部署不了;
- 设置自己的友链页面地址和主题类型,修改 hexo_circle_of_friends/fc_settings.yaml 文件
1
- {link: "https://blog.felicx.eu.org/friends/", theme: "stellar"} # 友链页地址1,修改为你的友链页地址
- 打开 Issues 友链抓取功能,修改 hexo_circle_of_friends/fc_settings.yaml
1
2
3
4
5
6
7
8GITHUB_FRIENDS_LINKS: {
enable: true, # true 开启github issue兼容
type: "volantis", # volantis/stellar用户请在这里填写volantis
owner: "FelicxFoster", # 填写你的github用户名
repo: "friends", # 填写你的github仓库名
state: "open", # 填写抓取的issue状态(open/closed)
label: "active",
} - 点击 Actions -> I understand my workflows, go ahead and enable them -> update-friends-posts -> Enable workflow -> 点击 Run workflow -> Run workflow 进行第一次运行;
- 运行时可能会遇到报错
ERROR: No matching distribution found for uvicorn==0.14.0,就是安装依赖项的问题,issue 里也有人提问过,修改下 .github/workflows/main.yml1
2
3
4
5- name: Install requirements
working-directory: ./hexo_circle_of_friends
run: |
pip install --upgrade 'pip<24.1'
pip install -r requirements.txt - 等待运行完毕后,仓库会新建 output 分支,同时在分支下面生成 data.json;
- 在 source\friends\rss\index.md 写入下面代码,其中 api 部分替换为自己仓库地址及其对应的 data.json 文件真实路径;
1
2
3
4
5
6
7
8
9
10
title: FriendCircle
robots: noindex,nofollow
menu_id: post
comments: false
nav_tabs: true # 这就意味着页面会显示首页文章导航栏
{% timeline type:fcircle api:https://raw.githubusercontent.com/FelicxFoster/friends-rss-generator/output/data.json %}
{% endtimeline %} - 在 _config.stellar.yml 中修改,即可实现在首页增加一个「FriendCircle」栏目的效果
1
2
3
4
5
6站点主结构树
site_tree:
# 博客列表页配置
index_blog:
nav_tabs: # 近期发布 分类 标签 专栏 归档 and ...
'FriendCircle': /friends/rss/
jsDelivr 加速 GitHub 文件访问
上面部署友链和朋友圈文章,使用的都是github仓库的json文件,国内环境大家都懂,指定是无法访问,这里介绍一种蠢方法,使用 jsDelivr 来加速这些 Github 文件的访问。
- 在要加速的 Github 仓库里,点击 Releases -> Create a new release -> Choose a tag -> 随便起个名比如 0.01 -> 点击 Publish release;
- 在使用时 tag 标签直接写 latest 就行;
- 使用如下规则访问 CDN 资源;
1
2https://cdn.jsdelivr.net/gh/<username>/<repo name>@<tag>/<resource name>
# 比如 https://cdn.jsdelivr.net/gh/FelicxFoster/friends@latest/v2/data.json - 然后替换掉上面的 api,现在就可以在国内愉快地访问友链和朋友圈了;
- 这种方法需要每次手动在 Github 上创建最新的 Releases(还没摸索出怎么使用 Github Action 自动生成);
- 需要注意的是,jsDelivr 是有缓存的,更新一般要 24h,所以最好一周再新建一次 Releases;
- 另外,如果发现页面没有生效,大部分是自己的浏览器缓存没清除导致的;
当然还有第二种方法,使用这个工具,实现 Github 链接转 Jsdelivr,直接插入转化后的链接,也能轻松实现国内访问。
添加 Google/Bing 收录
- 安装 hexo-generator-sitemap 插件来为网站生成网站地图(Sitemap)
1
npm install hexo-generator-sitemap --save
- 打开博客的配置文件 _config.yml,添加如下
1
2
3
4
5# Sitemap Generator
sitemap:
path: sitemap.xml
tags: false
categories: false - 打开 Google Search Console, 点击立即使用并登录谷歌账号;
- 选择网址前缀并输入站点网址,如 https://blog.felicx.eu.org ,点击继续;
- 验证方法选择 HTML 标记,然后复制 Google 提供的元标记
1
<meta name="google-site-verification" content="xxxxx" />
- 因为 Stellar 主题没有像 Next 主题一样,配置文件中没有 google_site_verification 设置项,所以直接修改 themes\stellar\layout_partial\head.ejs,找到 字段,在下面添加上面复制的元标记
1
<meta name="google-site-verification" content="xxxxx" />
- 将修改后的代码重新部署完毕后,点击 Google 中的验证即可;
- 同样 Bing 收录也是类似的,登录 Bing Webmaster Tools,登录添加站点,选择 HTML 标记,重复上述操作即可;
添加捐赠图标
身为博主,没有大家的激励怎么会有动力更新下去,所以一个 Buy Me A Coffee 图标是很有必要的。
参考 Stellar 主题,在每篇文章下面都会有 License 和 Share,那我们可以直接在原来代码的基础上添加一个 Donate。
- 在 themes\stellar\layout_partial\main\article\article_footer.ejs 中添加
1
2
3
4
5
6
7
8
9
10
11
12
13
14
15
16
17
18
19
20
21
22
23
24
25
26
27
28
29
30
31
32
33
34
35
36
37
38
39
40
41
42
43
44
45
46
47
48
49if (theme.article.donate) {
const donateImage = () => {
if (theme.article.donate.wechat) {
return `
<div class="donate-image" id="donate-wechat" style="display:none; position:absolute; z-index:1000; transform: translateY(-100%); left: 50%; transform: translateX(-50%) translateY(-100%);">
<img src="${theme.article.donate.wechat}" alt="Donate with WeChat" style="width: 150px; height: auto;" />
</div>
`;
} else {
return '';
}
};
el += `
<section id="donate">
<div class="header"><span>${__('meta.donate')}</span></div>
<div class="body">
<p>${__('请作者喝杯咖啡吧')}
<span class="donate-icon" onclick="showQRCode()" style="display: inline-block;">
<i class="fa-solid fa-gift fa-flip" style="font-size: 20px;"></i>
</span>
</p>
${donateImage()}
</div>
</section>
`;
el += `
<script>
const showQRCode = () => {
const qrCode = document.getElementById('donate-wechat');
qrCode.style.display = 'block';
document.addEventListener('click', hideQRCode);
};
const hideQRCode = (event) => {
const qrCode = document.getElementById('donate-wechat');
const donateIcon = document.querySelector('.donate-icon');
if (!qrCode.contains(event.target) && !donateIcon.contains(event.target)) {
qrCode.style.display = 'none';
document.removeEventListener('click', hideQRCode);
}
};
</script>
`;
} - 在 _config.stellar.yml 添加这样当你点击捐赠图标时,二维码会显示出来,再次点击页面的其他地方就会隐藏二维码
1
2
3
4######## Article ########
article:
donate:
wechat: '二维码图片'


